
Getting started with Gift Style
Everything from installing the app to shoppers picking gift options in your cart. No code editing required — if this is your first time, work through the steps in order.
Last updated: September 25, 2026
Install the app
Add it to your shop from the Shopify App Store.
Turn the app on
Switch Gift Style on under App embeds in your theme.
Add it to the cart
Add the Gift options block to your cart page.
Build your options
Pick a preset, choose the products, and save.
Check how it looks
Open a real cart and see what your shoppers see.
1Install the app
On the Gift Style page in the Shopify App Store, choose Install to add the app to your shop. Once it is installed, Gift Style appears under Apps in your Shopify admin.
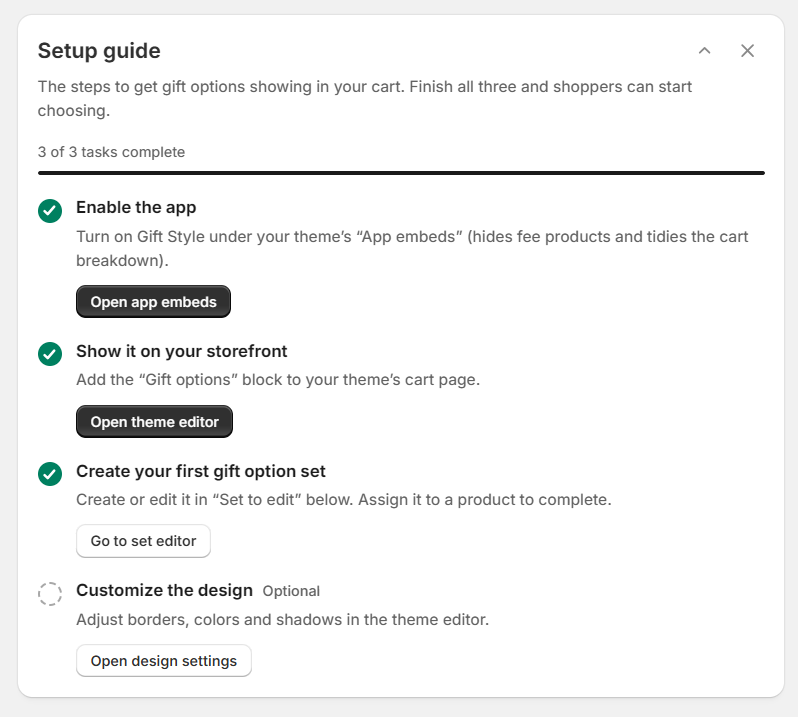
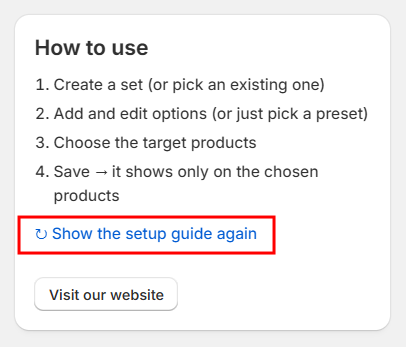
When you open the app, a Setup guide appears. The three tasks in it map to steps 2–4 on this page. You can minimise or hide the guide from the top right, and bring it back later from How to use → ↻ Show setup guide.
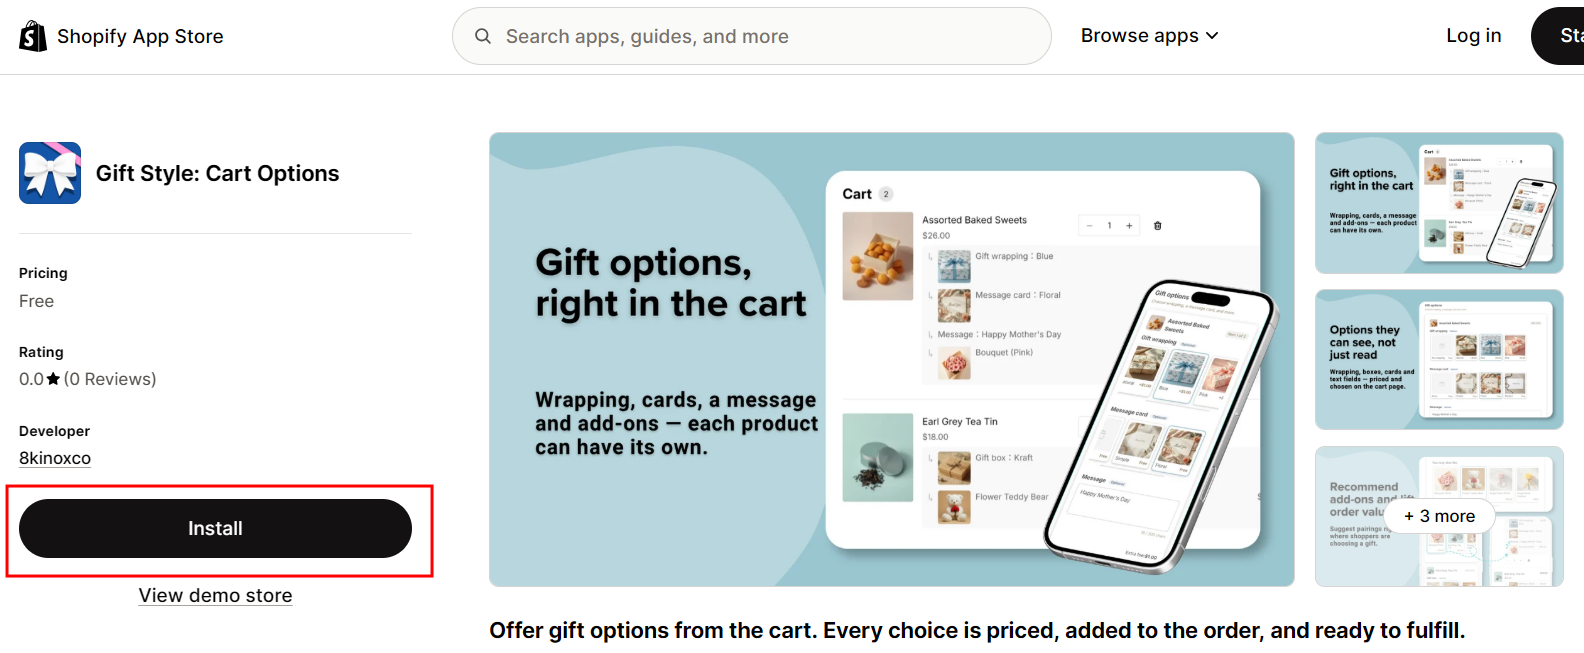
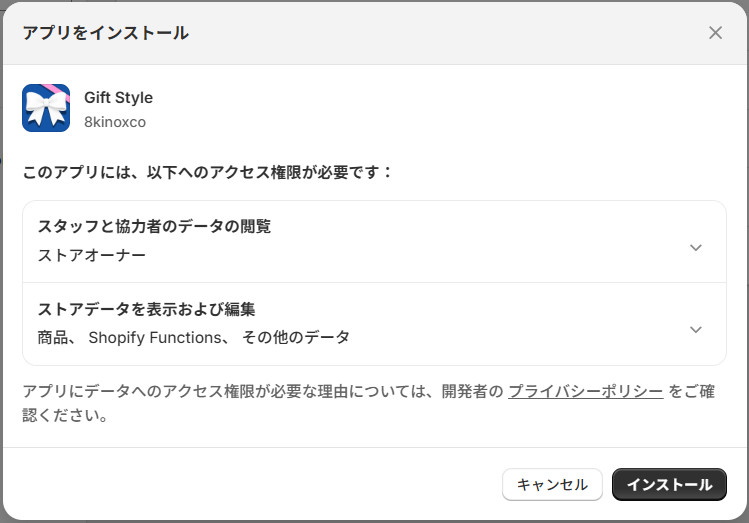

Available on the App Store
Installing is free, and every gift option is free to use.
2Turn the app on
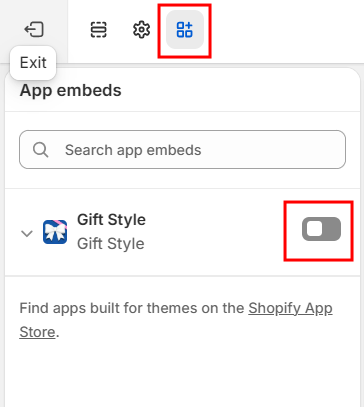
Switch Gift Style on under App embeds in your theme. This is what tidies up how the options appear around the cart.
- In the Gift Style Setup guide, press Open app embeds (the theme editor opens in a new tab).
- Find Gift Style under App embeds on the left and turn the switch on.
- Press Save in the top right.
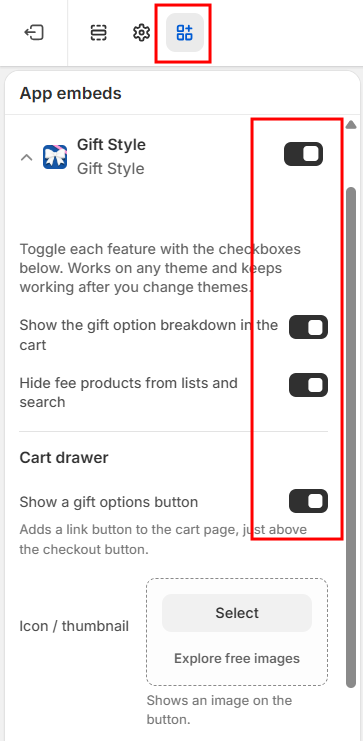
What it enables
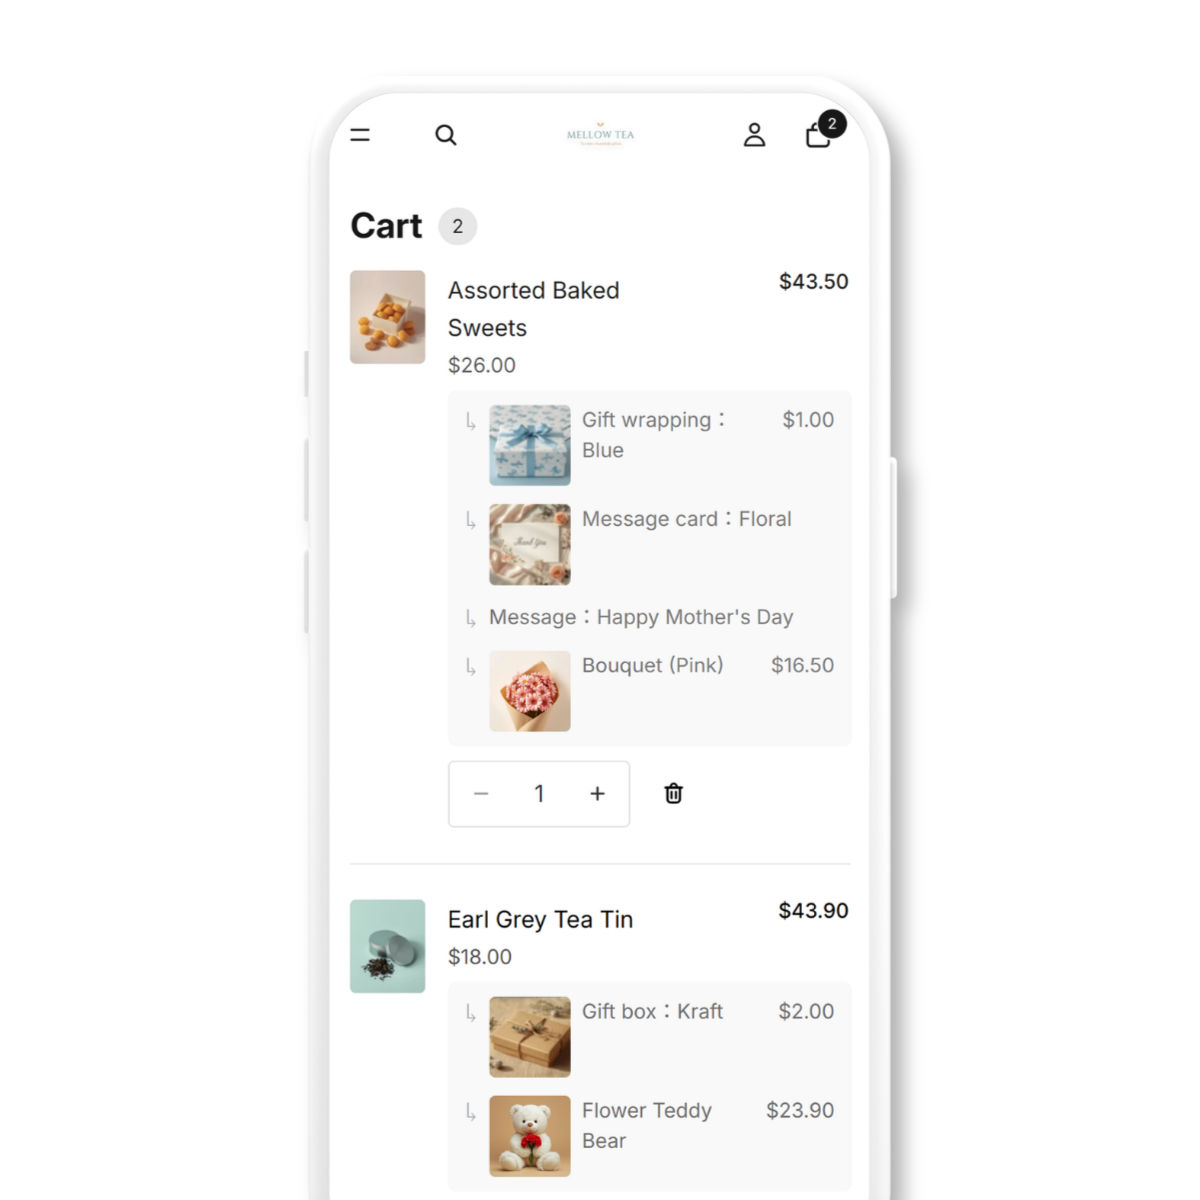
- Show the gift option breakdown in the cart — each choice appears under the product it belongs to, so the cart does not fill up with extra line items.
- Hide priced option products from listings and search — the products created to carry option prices are kept out of your collections and search results. Some themes still show them; if that happens, get in touch.
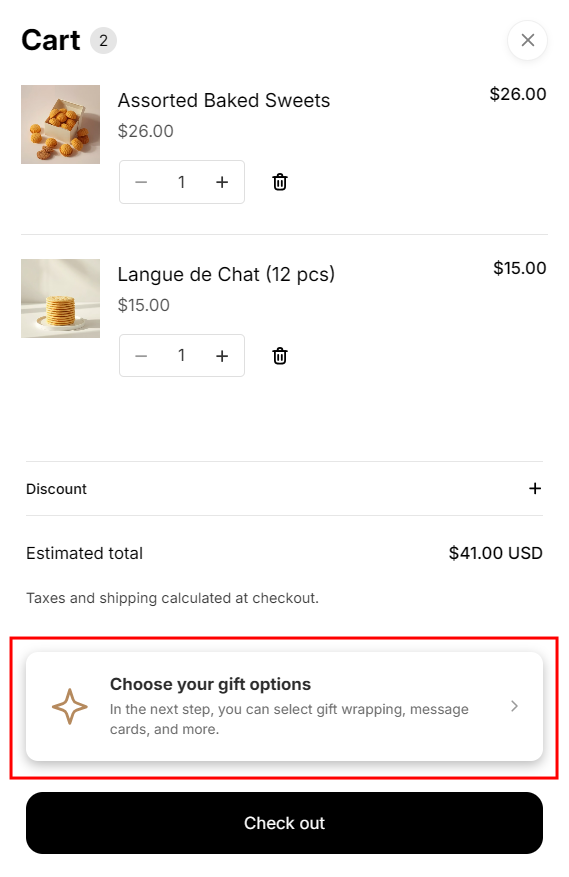
- Cart drawer: show a button to the gift options — for themes that use a slide-out cart, this adds a link to the cart page just above the checkout button.
3Add it to the cart
The screen where shoppers pick their options goes on the cart page. It reads what is in the cart, so it cannot be placed on product pages or the home page.
- In the Gift Style Setup guide, press Open theme editor.
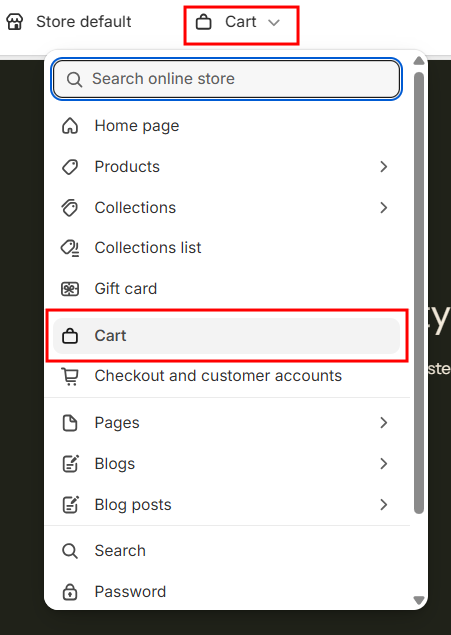
- Use the page switcher at the top to select Cart.
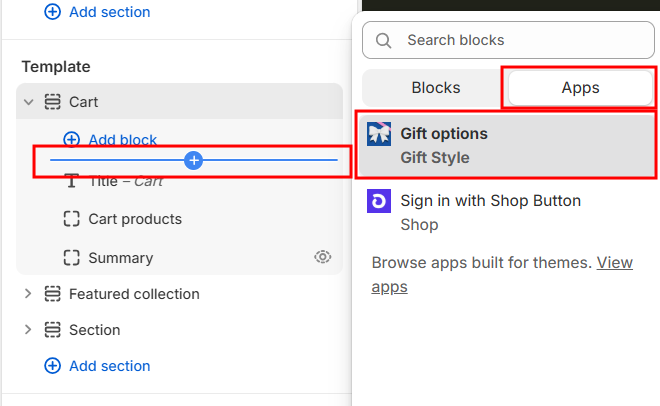
- From Add section / Add block, choose Gift options (under the Apps tab).
- Drag it into position and press Save in the top right.
Two ways to place it
Inside the cart section
Select the cart section and add Gift options as a block inside it. The width lines up with the cart, and on a phone the order reads naturally: options, then checkout.
As its own section
Add it as a section anywhere on the cart page. It stands out more, but on desktop it spans the full width of the screen.
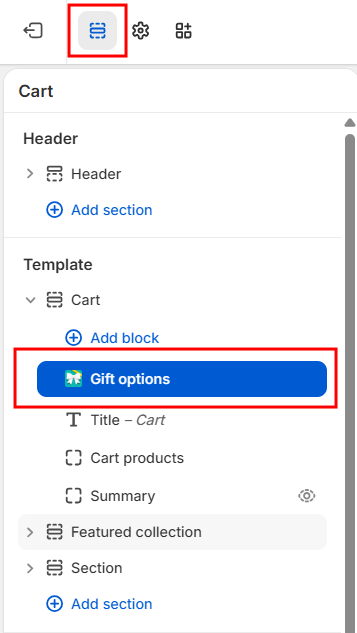
Themes differ: some themes (a few Dawn-based ones, for example) do not allow app blocks inside the cart section. In that case, add it as its own section instead.
Not the same as App embeds: the Gift Style app embed from step 2 and this Gift options block do different jobs. You need both.
Block settings
Select the block you added, and the theme editor panel on the right lets you change the following.
- Heading and description, plus the upsell heading (the "You may also like" wording)
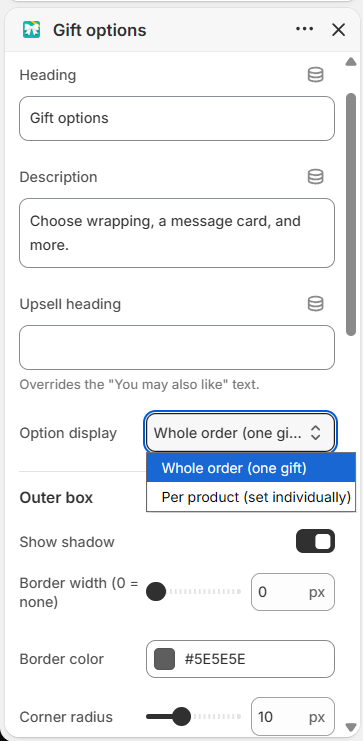
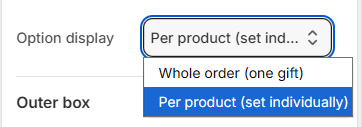
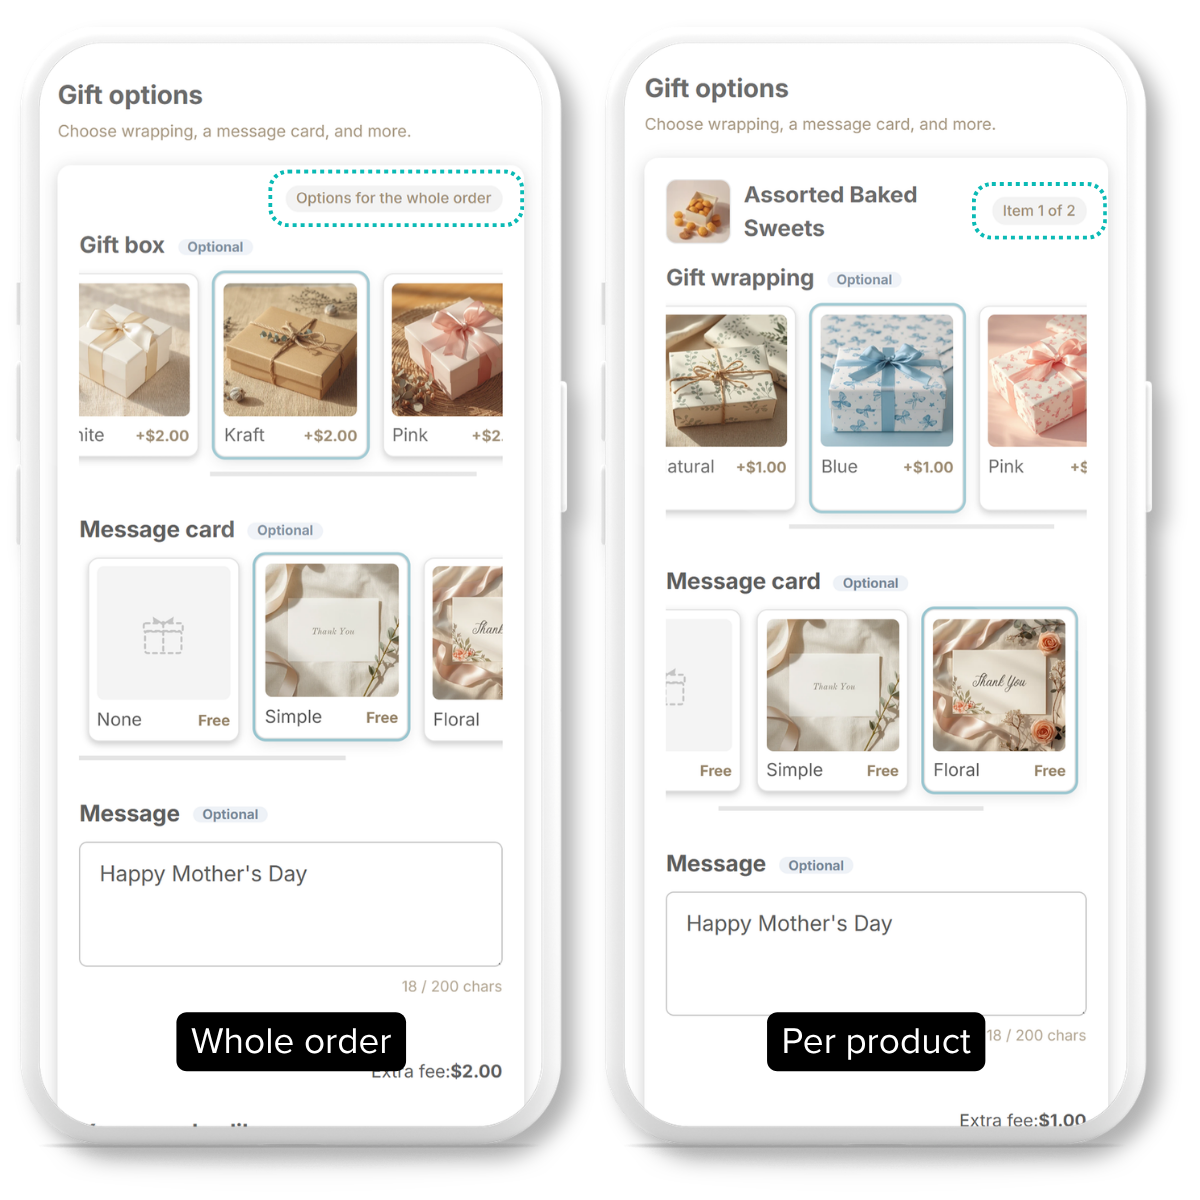
- Option scope — per product (set for each product) or whole order (treat the order as one gift)
- Frame, cards, colors and type — border width and color, corner radius, shadow, background, accent color, font size. Match your shop without writing any CSS.
Per product, or per order
The same set can be shown at different levels. Choose per product if each item may be wrapped differently, or whole order if the order is treated as a single gift.
4Build your options
Back in the app, build the contents under Gift option settings. It takes three steps.
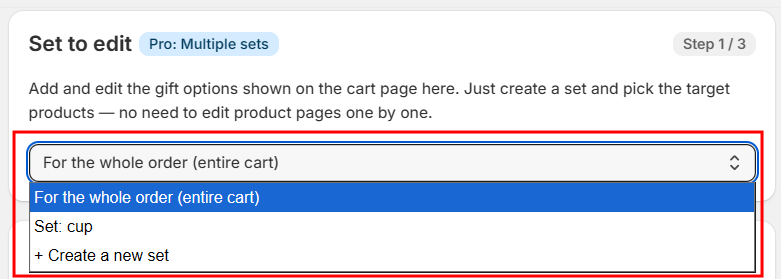
Step 1 of 3: choose a set
A set defines which options appear on which products. Create one with + New set, or pick an existing one. To treat the order as a single gift, use the Whole order set.
Step 2 of 3: option items
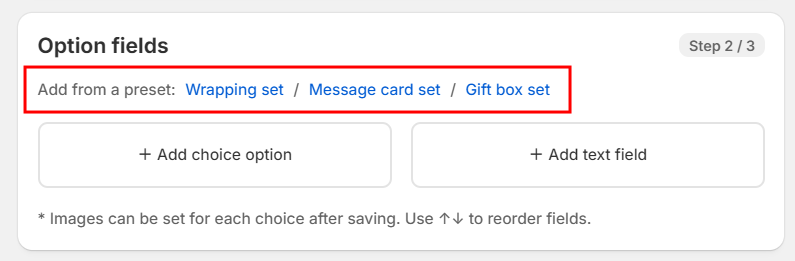
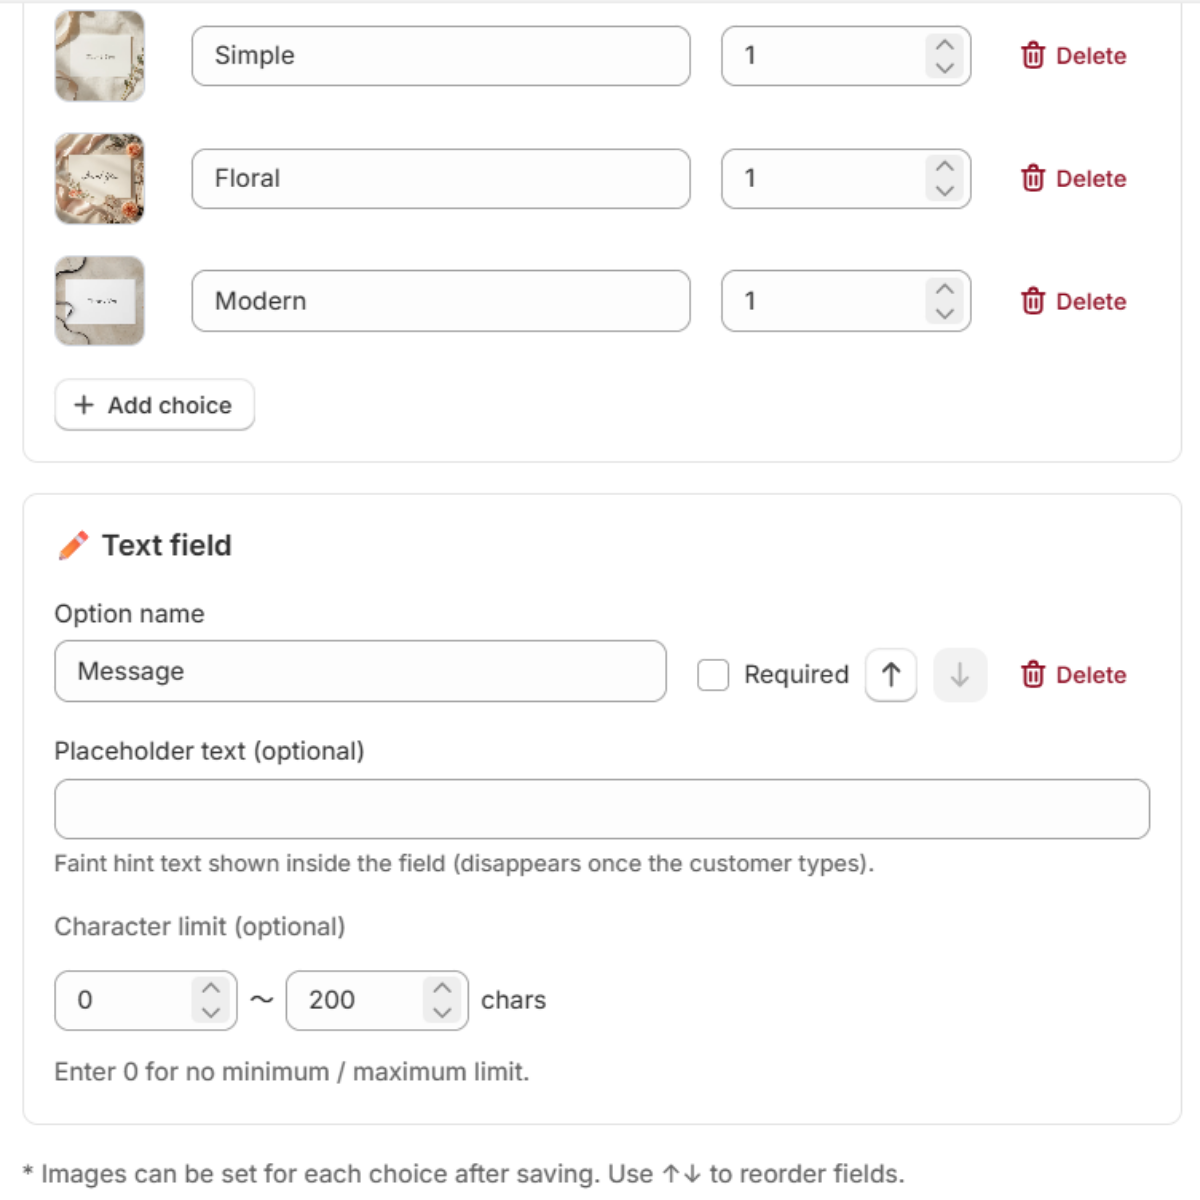
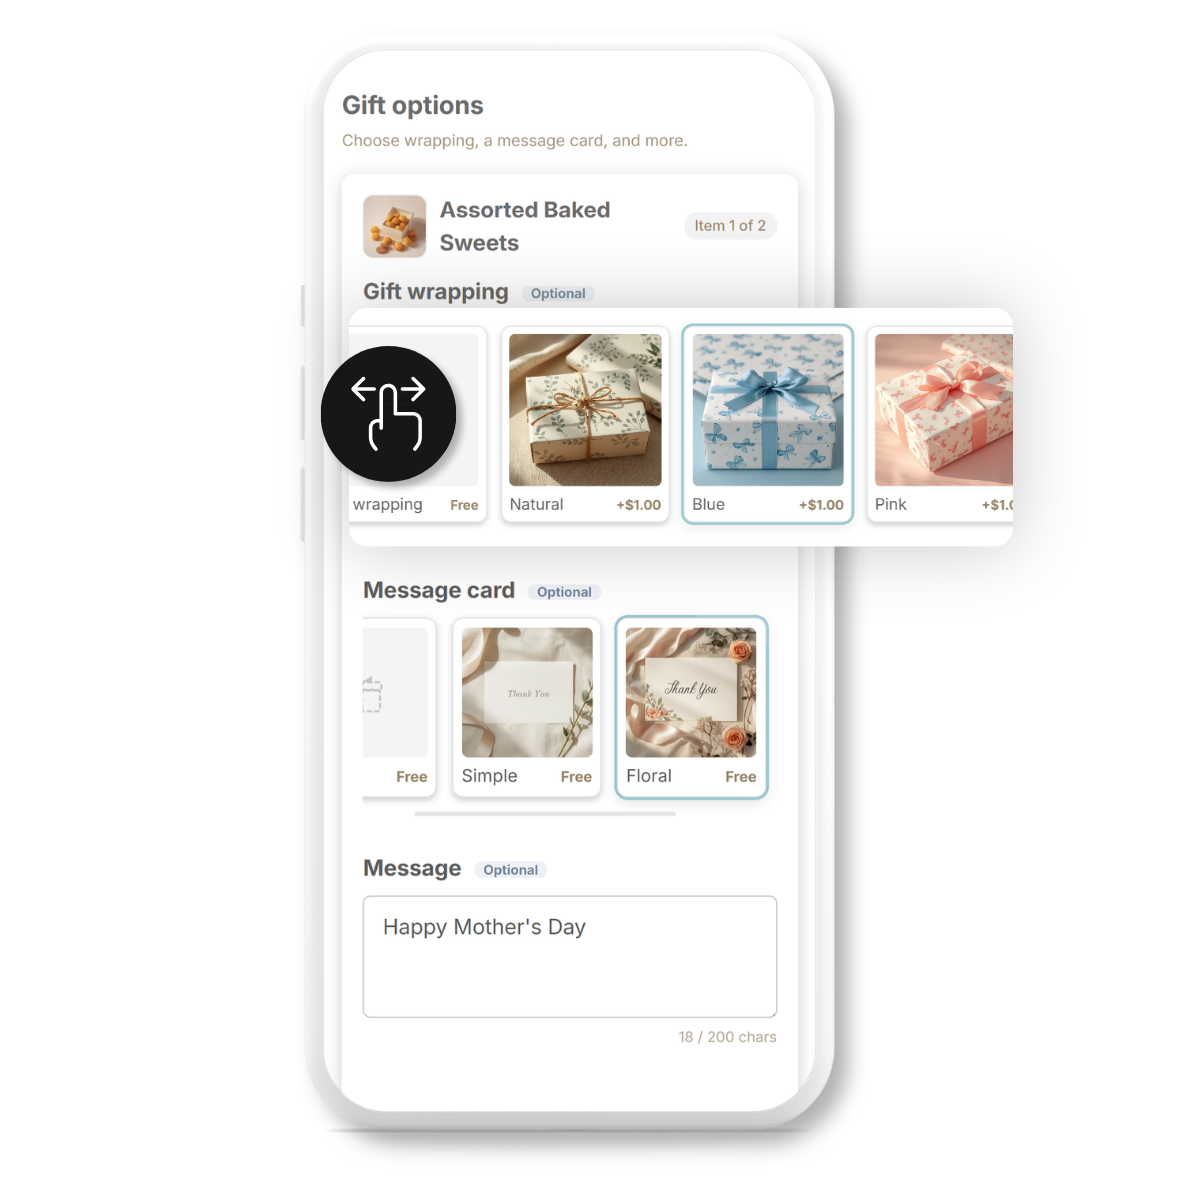
Under Add from preset, press Wrapping set, Message card set or Gift box set and the choices drop in complete with images.
- Add a choice option — something the shopper picks, such as wrapping or a box.
- Add a text field — something the shopper types, such as a gift message or an engraved name. You can set minimum and maximum length.
- Display style — image cards (recommended) or dropdown menu.
- Extra charge — enter an amount and it is added to the cart total.
- Required and move up / down — mark a field as required, or reorder the items.
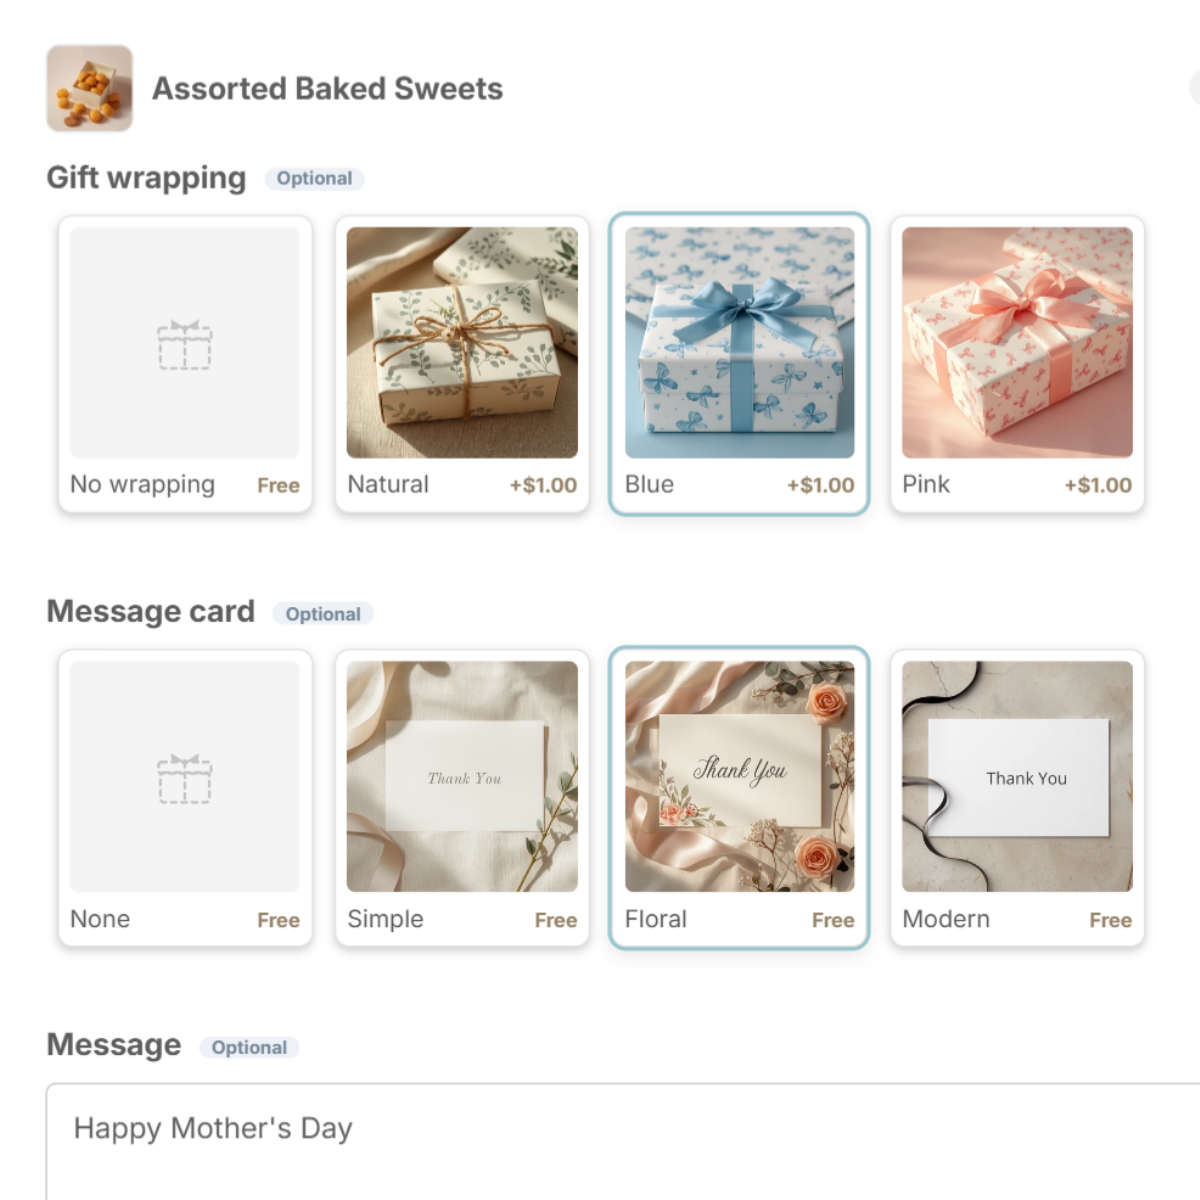
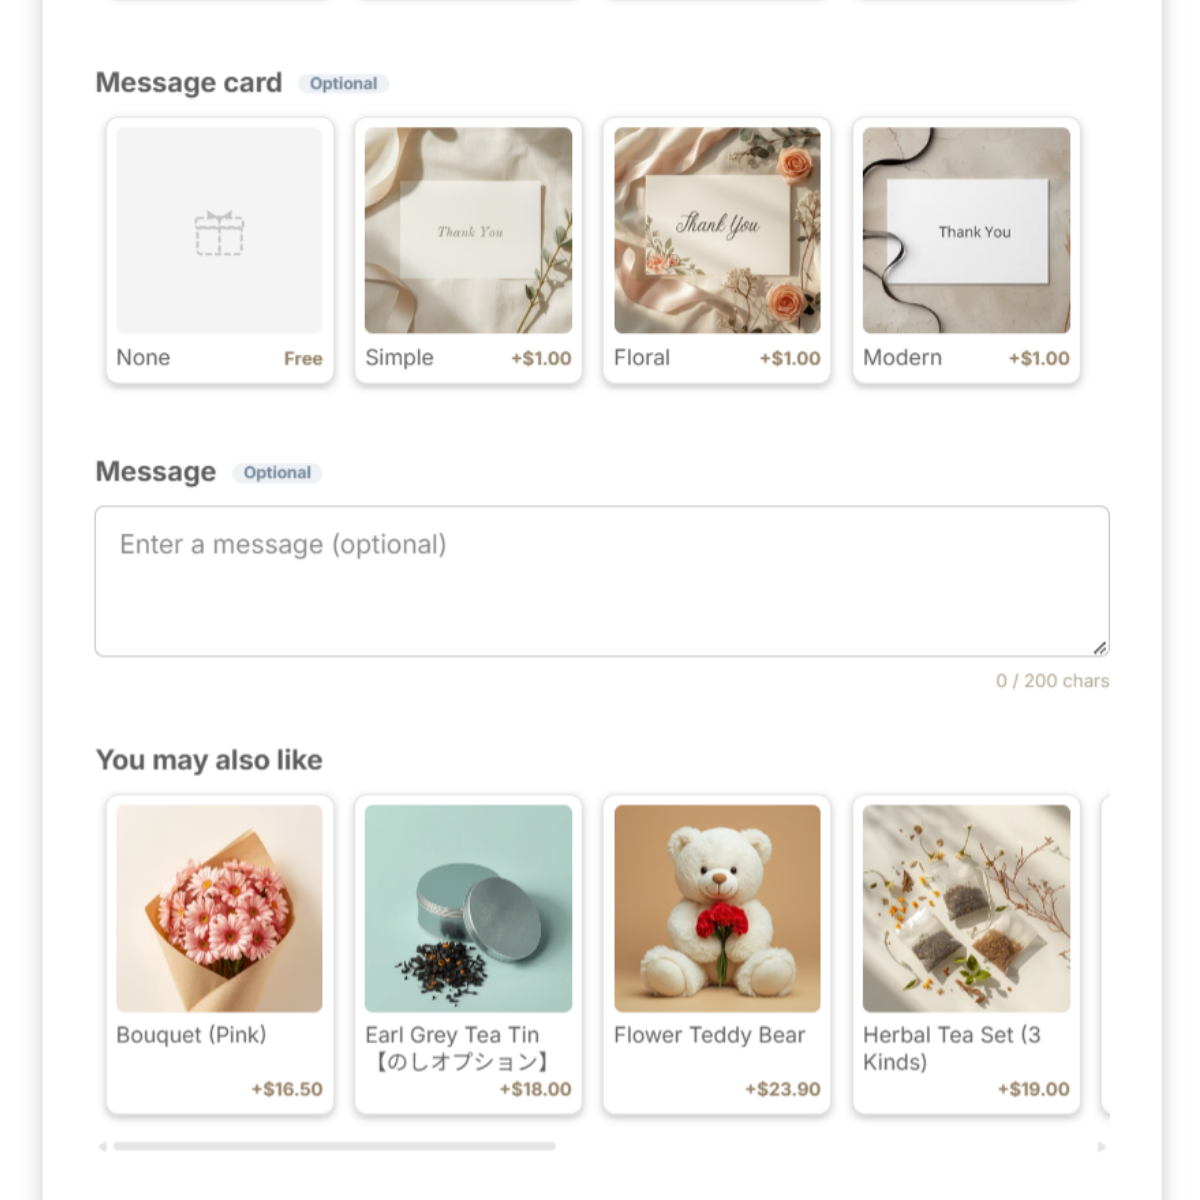
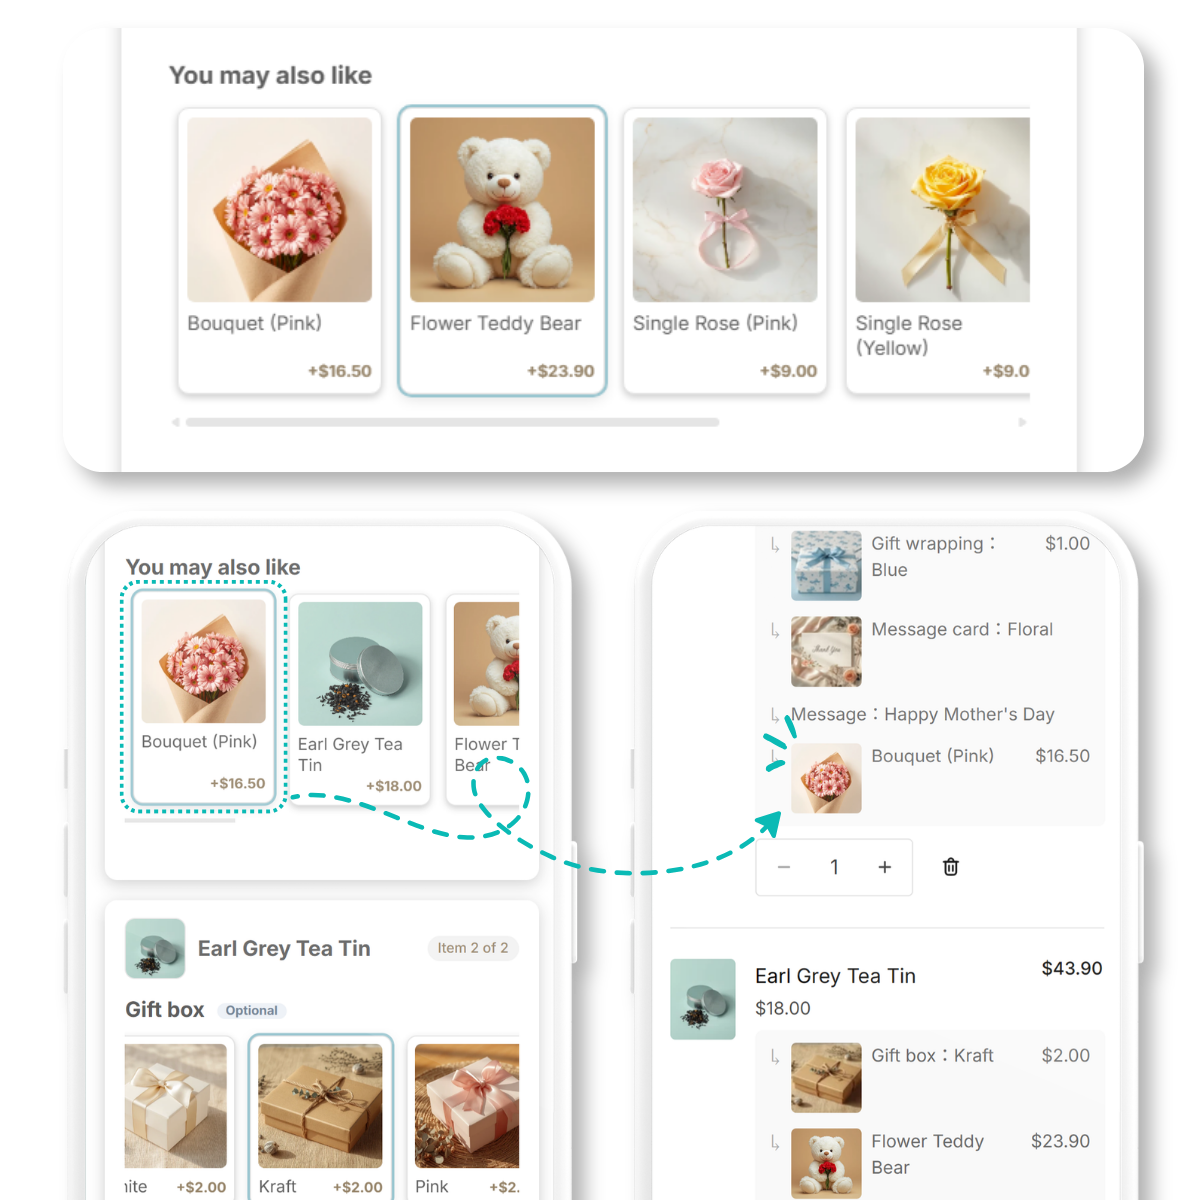
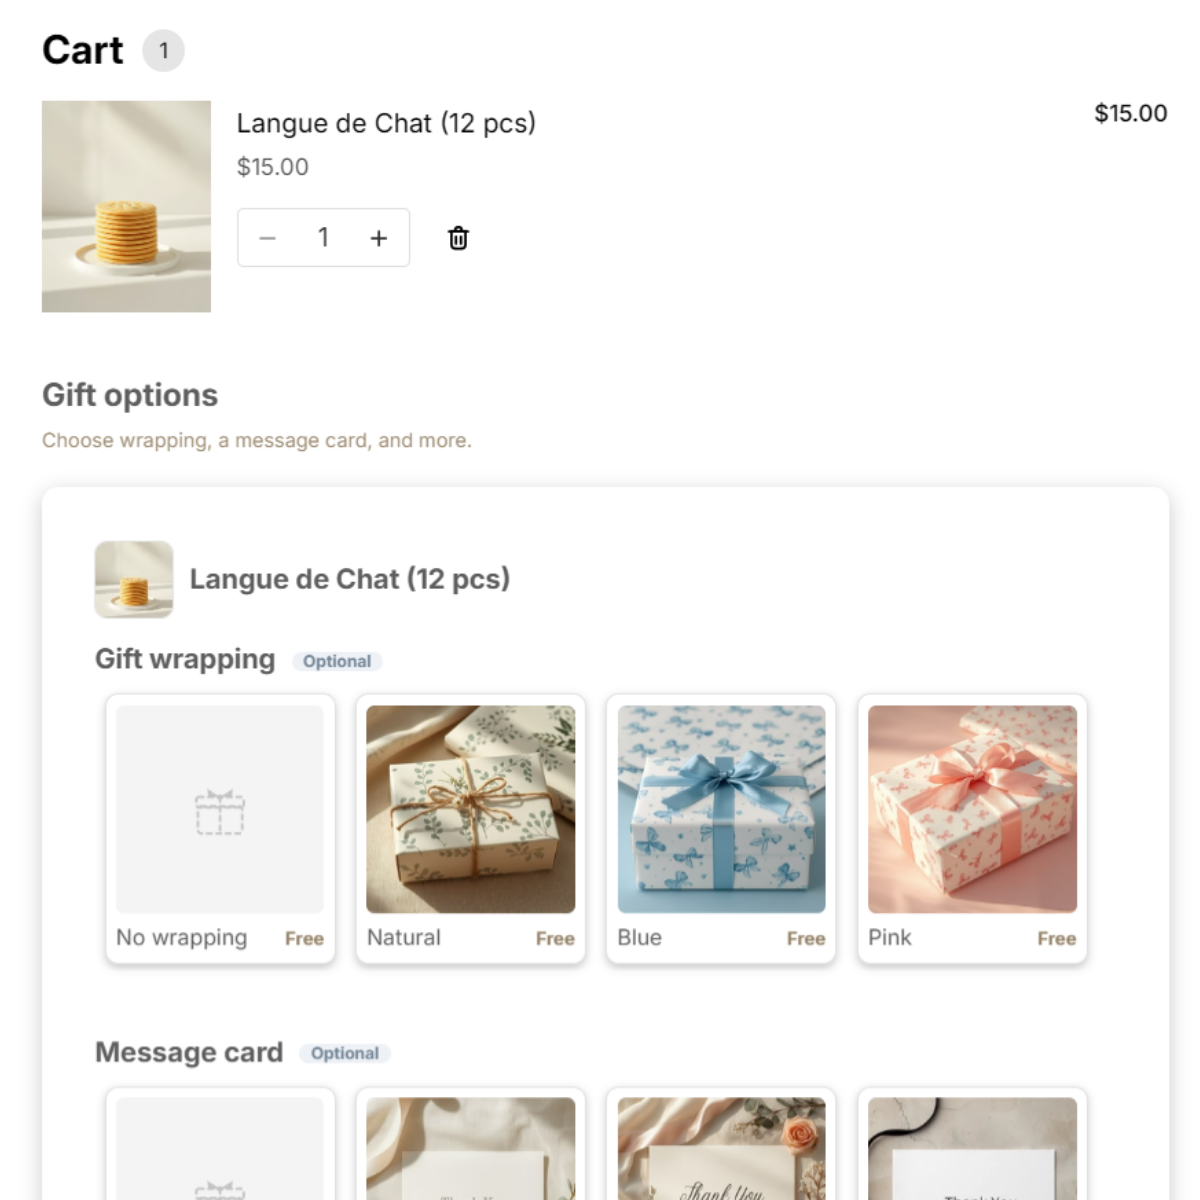
Once a preset is in, this is what shoppers see in the cart.
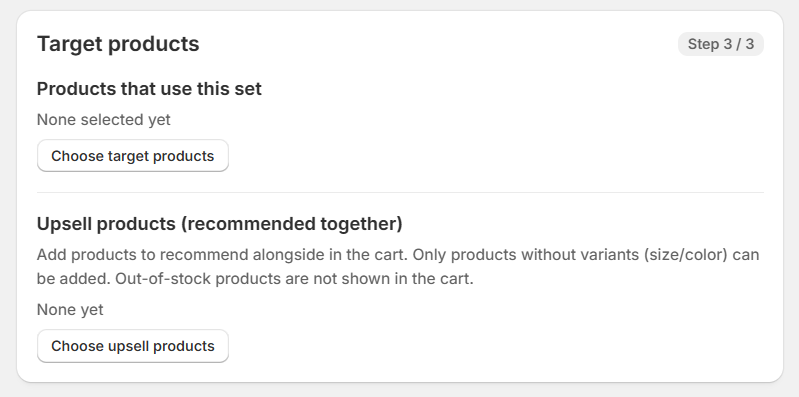
Step 3 of 3: target products
Use Choose products to pick which products this set applies to — the options only show for those. Choose upsell products lets you suggest related items while the shopper is choosing a gift.
Finish with Save. Any preset item without an image gets the built-in artwork automatically.
5Check how it looks
Add one of the products to your cart and open the cart page. Check the options appear, exactly as a shopper would see them.
- If Storefront display at the top of the app still says Not set, the block from step 3 has not been added yet. Use Add in theme.
- If no options appear, check the product is included in the target products from step 3 of 3.
- The selections stay on the order, so you can read them from the usual order screen when you pack it.
Turns the feature itself on or off, across the theme
Sets where it appears on the cart page
Contact & support
Setup questions, bug reports and feature requests — all welcome through the form below. We reply in English or Japanese.
-
⚙️
Setup and how-to
Followed the steps but nothing shows, or it is not behaving the way you expected.
-
🐛
Bug reports
Found an error or a layout problem? Let us know here.
-
💡
Feature requests
"I wish it could do this" — we would like to hear it.
Helpful details to include: your store URL, your theme name, which screen it happens on (the cart page, for example), and a screenshot. It makes the cause much faster to find.